
Tallow rendering process: Your natural skincare guide
Most people assume rendering tallow is complicated, messy, or something only farmers do. It’s not. The tallow rendering process is simply the slow melting and purification of beef fat, and understanding it is the difference between a skincare ingredient that works beautifully and one that turns rancid in weeks. If you’ve been exploring natural, minimalist skincare and wondering what “rendered tallow” actually means, you’re in the right place. This guide breaks down every step, explains why the method you choose matters for your skin, and gives you the knowledge to either render your own or recognize quality when you see it.
Table of Contents
- The basics of tallow and the rendering process
- How to render tallow at home: Wet and dry methods compared
- Step-by-step wet rendering process for skincare tallow
- Understanding quality, odor, and purity: What to expect in skincare tallow
- Expert tips for maximizing your tallow’s skincare benefits
- Why understanding the rendering process transforms your natural skincare experience
- Explore pure handcrafted tallow balms for your skin
- Frequently asked questions
Key Takeaways
| Point | Details |
|---|---|
| Tallow definition | Tallow is purified beef fat made by slowly melting and separating pure fat from raw suet with impurities removed. |
| Wet rendering benefits | Using water in wet rendering prevents burning and produces paler, low-odor tallow ideal for skincare. |
| Purity matters | Scraping impurities from solid tallow extends shelf life and prevents rancid odors in skincare products. |
| Rendering tips | Freezing suet before cutting and blending during rendering speeds the process without sacrificing quality. |
| Home use advantage | Rendering tallow at home gives you control over purity and odor for natural, effective skincare ingredients. |
The basics of tallow and the rendering process
Tallow starts as suet, the hard, dense fat found around a cow’s kidneys and loins. Raw suet is not the same as tallow. It contains proteins, connective tissue, blood vessels, and moisture, all of which cause spoilage and odor if left in the final product. Rendering is the process that removes all of that, leaving behind pure, stable fat. As beef fat becomes tallow through slow heat, those impurities either evaporate, sink into water, or get filtered out through straining.
This matters enormously for skincare. Impure tallow smells like a steakhouse and goes bad within weeks. Properly rendered tallow, by contrast, has a neutral scent, a creamy white color, and a shelf life measured in months. It’s also worth knowing that tallow is not lard. Lard comes from pigs. Tallow comes from cattle. Both are rendered animal fats, but their fatty acid profiles differ, and tallow’s composition is notably closer to human sebum, the oil your skin naturally produces.
Here’s what you need to get started with the home rendering process:
- Suet: Preferably from grass-fed, pasture-raised cattle for higher nutrient content
- Slow cooker or heavy-bottomed pot: Low, even heat is essential
- Sharp knife or meat grinder: For cutting suet into small, even pieces
- Cheesecloth or fine mesh strainer: For filtering out solids
- Glass jars: For storing finished tallow
Now that you understand what tallow is, let’s explore the detailed steps involved in rendering it at home.
How to render tallow at home: Wet and dry methods compared
There are two main approaches to rendering tallow: dry and wet. Dry rendering cooks suet directly in a pot or slow cooker without any added water. It produces a richer, slightly golden tallow with a noticeable beefy aroma. That aroma is fine for cooking, but it’s a problem for skincare. Nobody wants to smell like a pot roast.
Wet rendering is preferred for skincare because water buffers the heat, prevents scorching, and pulls impurities down into the liquid layer beneath the fat. The result is paler, virtually odorless tallow that blends cleanly into balms and lotions. There’s also a lower risk of burning, which is the most common mistake beginners make with dry rendering.
One underrated trick: adding 1-2 tablespoons of non-iodized salt per pound of fat during wet rendering draws out proteins more aggressively, reducing odor even further. You’ll want to do a final render without salt afterward, or rinse the solidified tallow, to avoid any salty residue in your skincare products.
| Feature | Dry rendering | Wet rendering |
|---|---|---|
| Water added | No | Yes (1-4 cups) |
| Odor level | Strong, beefy | Mild to neutral |
| Color | Golden to tan | Pale white |
| Burn risk | Higher | Lower |
| Best for | Cooking | Skincare and balms |
| Time | 4-6 hours | 6-9 hours |
Key advantages of wet rendering for skincare:
- Impurities migrate into the water layer, making separation easier
- Lower heat exposure preserves more of tallow’s natural fatty acids
- Produces a cleaner, more neutral base for wet rendered tallow uses in balms and moisturizers
- Consistent results even for beginners
Pro Tip: Use a slow cooker set to low heat for wet rendering. You can walk away for hours without worrying about scorching. The slow cooker’s gentle, consistent temperature is practically designed for this.
With the key differences understood, let’s break down the practical steps for rendering tallow at home using the wet method.
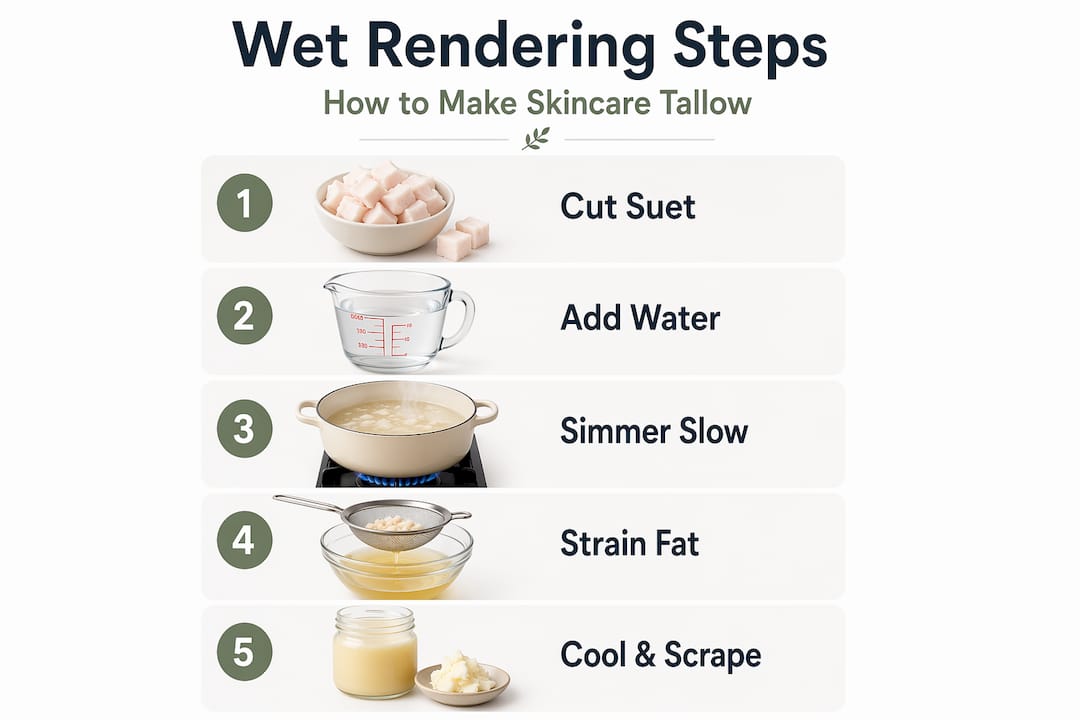
Step-by-step wet rendering process for skincare tallow
Getting this right comes down to patience and a few non-negotiable details. Rushing the heat or skipping the final purification step are the two mistakes that ruin most home batches.
- Partially freeze your suet. Place raw suet in the freezer for about 30 minutes before cutting. Cold fat firms up and cuts cleanly instead of smearing, which leads to more even rendering.
- Cut suet into small, even pieces. Aim for half-inch to one-inch cubes. Smaller pieces melt faster and more evenly. A meat grinder works even better if you have one.
- Add water to your slow cooker. Pour in 1 to 4 cups of water before adding the suet. This is what separates wet rendering from dry. The water prevents the fat from making direct contact with the hot surface.
- Cook on low heat for 6 to 9 hours. Wet rendering takes 6 or more hours on low to fully melt and purify the fat. Resist the urge to turn up the heat. Higher temperatures scorch the fat and darken the color.
- Optional: Blend partway through. After about 2 hours, the suet will have softened significantly. Carefully blending it at this point speeds up the remaining melt time without burning anything.
- Strain through cheesecloth. Once the fat is fully liquid, pour it through a cheesecloth-lined strainer into a clean container. This removes the solid bits, called cracklings, that remain after rendering.
- Chill until solid. Refrigerate the strained fat overnight. It will separate into two layers: a firm white tallow layer on top and a darker, impurity-rich water layer on the bottom.
- Flip and scrape. Remove the solidified tallow block, flip it over, and scrape off the brown flecks on the underside. These are the remaining impurities that settled during cooling.
This ideal tallow for balms is now ready to use directly or refined further for pure tallow benefits in your skincare routine.
Pro Tip: Only scrape the bottom 10 to 20% of the tallow block. Removing too much pulls in good fat and can introduce a slightly burnt quality to the final product.
Now that you know the precise rendering steps, let’s look at how these methods compare in quality and what nuances affect your skincare product.
Understanding quality, odor, and purity: What to expect in skincare tallow
The difference between mediocre tallow and exceptional tallow is almost entirely about purity. Proteins and membrane fragments left behind after rendering are the primary cause of rancidity and off-odors. They break down quickly, especially at room temperature, and they pull other fats along with them into spoilage.
Wet rendering yields paler, smell-neutral tallow by shifting those impurities into the water layer below the fat. This is why the water at the bottom of your slow cooker looks murky and brown after rendering. That cloudiness is exactly what you don’t want in your skincare product. Wet rendering pulls it out so your tallow doesn’t have to carry it.
The brown flecks you see after solidifying are a second wave of those same impurities. Leaving them on the tallow block shortens shelf life to as little as one to three months, even with refrigeration. Scraping them off consistently extends shelf life and keeps the scent clean.
“Rendering is not just a process, it’s the foundation of quality natural skincare.”
What to look for in skincare tallow quality:
- Color: Bright white to very pale ivory. Any yellow or tan suggests impurities or dry rendering.
- Scent: Neutral to very faintly fatty. Strong beefy odor means impurities remain.
- Texture: Smooth and firm at room temperature, not grainy or crumbly.
- Shelf life: Properly rendered tallow lasts 6 to 12 months at room temperature, longer refrigerated.
| Property | Dry rendered tallow | Wet rendered tallow |
|---|---|---|
| Color | Golden to tan | Pale white |
| Odor | Noticeable, beefy | Mild to neutral |
| Skincare suitability | Limited | Excellent |
| Shelf life (room temp) | 3-6 months | 6-12 months |
| Impurity removal | Moderate | High |
Understanding quality nuances helps you confidently produce tallow suited for your natural skincare applications.
Expert tips for maximizing your tallow’s skincare benefits
A few small adjustments during the rendering process make a significant difference in the final product. These are the details that separate a batch you’re proud of from one you end up throwing out.
- Freeze suet before cutting. Freezing suet for 30 minutes before slicing prevents smearing and gives you clean, even pieces that melt uniformly.
- Blend partway through. Blending softened suet after 2 hours cuts total rendering time by 30 to 50% without any risk of burning.
- Use non-iodized salt strategically. Add it in the first render to pull out proteins, then do a final render without salt to keep your balm free of any mineral taste or residue.
- Double strain for extra purity. Run your liquid tallow through cheesecloth twice. The second pass catches fine particles the first one missed, giving you a smoother, cleaner product.
- Store correctly. Keep rendered tallow in airtight glass jars away from light and heat. A cool pantry works fine for short-term use; the refrigerator extends life considerably.
You can also optimize tallow rendering by sourcing suet from grass-fed cattle. The fat from grass-fed animals contains higher levels of conjugated linoleic acid and fat-soluble vitamins, both of which contribute to tallow’s reputation as a deeply nourishing skincare ingredient.
Pro Tip: Avoid scraping aggressively across the entire bottom of the solidified tallow block. Focus only on the discolored bottom layer, roughly the bottom 10 to 20%, to preserve the clean fat above it.
With these expert tips, you’re ready to harness tallow’s full potential in your natural skincare routine.
Why understanding the rendering process transforms your natural skincare experience
Here’s something most tallow skincare content won’t tell you: the rendering method is more important than the source. You can start with the finest grass-fed suet in the world and ruin it with a rushed dry render or a skipped scraping step. The technique is the product.
Most consumers who try tallow skincare and feel underwhelmed are working with poorly rendered fat. They notice the smell. They see the yellowish color. They wonder why it feels slightly greasy rather than absorbing cleanly. Those are rendering problems, not tallow problems. The ingredient itself is extraordinary when it’s done right.
Learning the wet rendering method is also a way to reconnect with a craft that was once common knowledge. Before synthetic emollients and petroleum-based moisturizers took over the market, rendered animal fat was the foundation of skin care across cultures. Understanding making skincare with tallow isn’t just a practical skill. It’s a recalibration of what we expect from the things we put on our bodies.
There’s also a customization angle that commercial products can’t offer. When you render your own tallow, you control the purity level, the scent profile, and the texture. Want a firmer balm? Render longer. Want something softer? Blend in a touch of jojoba oil. That level of control is only possible when you understand what you’re actually doing, and why each step matters.
Explore pure handcrafted tallow balms for your skin
Now that you understand tallow rendering deeply, Sevaux’s balms offer a trusted way to enjoy its skincare benefits today. Every batch is made with carefully wet-rendered, grass-fed beef tallow, processed to the standard this article describes: pale, neutral-scented, and free of impurities.
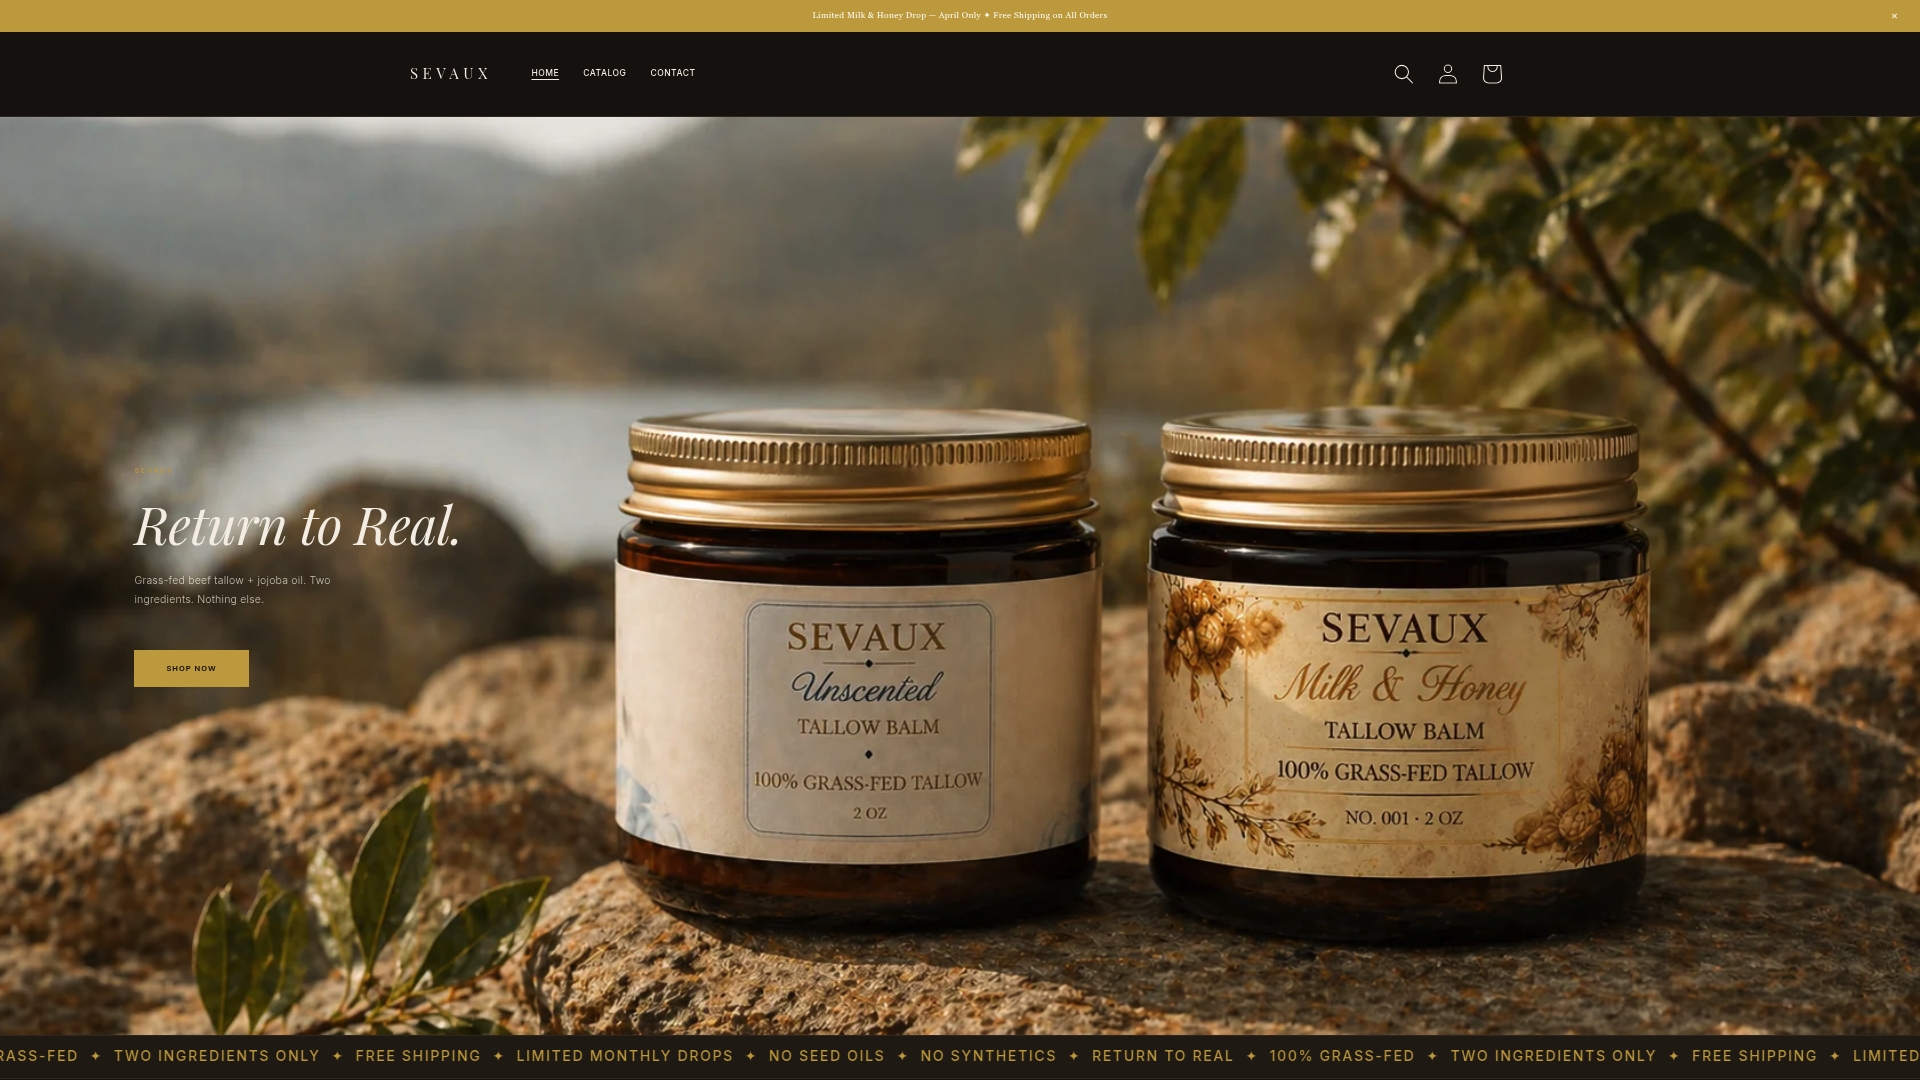
If you’d rather skip the slow cooker and go straight to the result, Sevaux has two options worth exploring. The Unscented Tallow Balm keeps it as minimal as possible, just tallow and jojoba oil, nothing else. The Milk & Honey Tallow Balm adds a gentle, natural scent for those who want something a little warmer. Both reflect the rendering standards covered in this guide. To learn more about the sourcing and process behind each product, the Sevaux story page is worth a read.
Frequently asked questions
What is the main difference between wet and dry tallow rendering?
Wet rendering adds water to buffer heat and pull impurities into a separate layer, producing paler, virtually odorless tallow ideal for skincare. Dry rendering skips the water, resulting in stronger beefy aroma and a darker color better suited for cooking than balms.
How long does the wet rendering process typically take?
Wet rendering takes 6 or more hours on low heat in a slow cooker to fully melt and purify the suet. Blending the softened fat partway through can shorten that window by up to 50%.
Why is scraping brown flecks off solidified tallow important?
Those brown flecks are concentrated impurities, mostly proteins and membrane fragments, that cause rancidity within 1 to 3 months if left on the tallow block. Scraping them off is one of the simplest ways to extend shelf life and keep the scent neutral.
Can adding salt during rendering improve tallow quality?
Yes. Using 1-2 tablespoons of non-iodized salt per pound of fat during wet rendering draws out proteins more effectively and reduces odor. Follow up with a salt-free final render or rinse to avoid any mineral residue in your finished skincare product.
Is home-rendered tallow suitable for making natural skincare products?
Absolutely. Wet rendered tallow produces high-quality, low-odor fat that works beautifully in balms, lotions, and soaps. The key is following the full purification process, including straining, chilling, and scraping, to get a truly clean result.